Winter Garden Planning

Winter Garden Planning

Garden Planning –

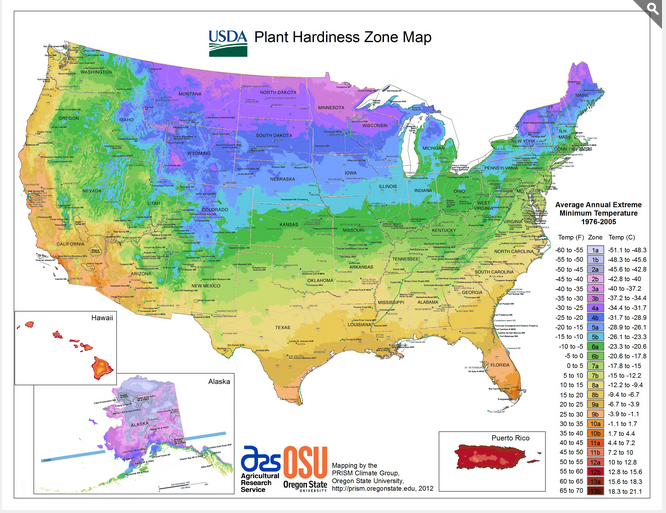
Depending on your neck of the woods, you are likely facing a season of short grey days with extreme cold. You may not be thinking of gardening quite yet. Winter isn’t gardening season, but it’s the perfect month for garden planning. Plotting this years’ garden and anticipating needs like soil, compost and plants can all be organized long before it’s warm enough to break ground in the spring. Visit garden.org/nga/zipzone/2012 to see your planting zone. You can do your research online or work with your local gardening center. Make a layout of your space and determine what percentage of your garden you want to allocate to each crop. If you’ve planted a garden before, keep in mind it is best for productivity to rotate the location of the plants.

Try journaling about your garden. Keep notes about your garden space, the types and varieties of plants/seeds and growing notes. If you have journaled each season’s successful gardening and logged the less than successful plant growth, you have a better idea of what seeds to order for this spring. If your local garden center isn’t yet available for seeds, check out Baker’s Creek Heirloom Seeds www.rareseeds.com for inspiration. Park Seeds parkseed.com carries seed pods as an excellent source for starting plants inside this winter in anticipation of your planing season. Domes and soil plugs have been successful for many gardeners. And if you haven’t maintained a gardening journal in the past, perhaps including plans to begin this season would serve you well in next year’s planning.

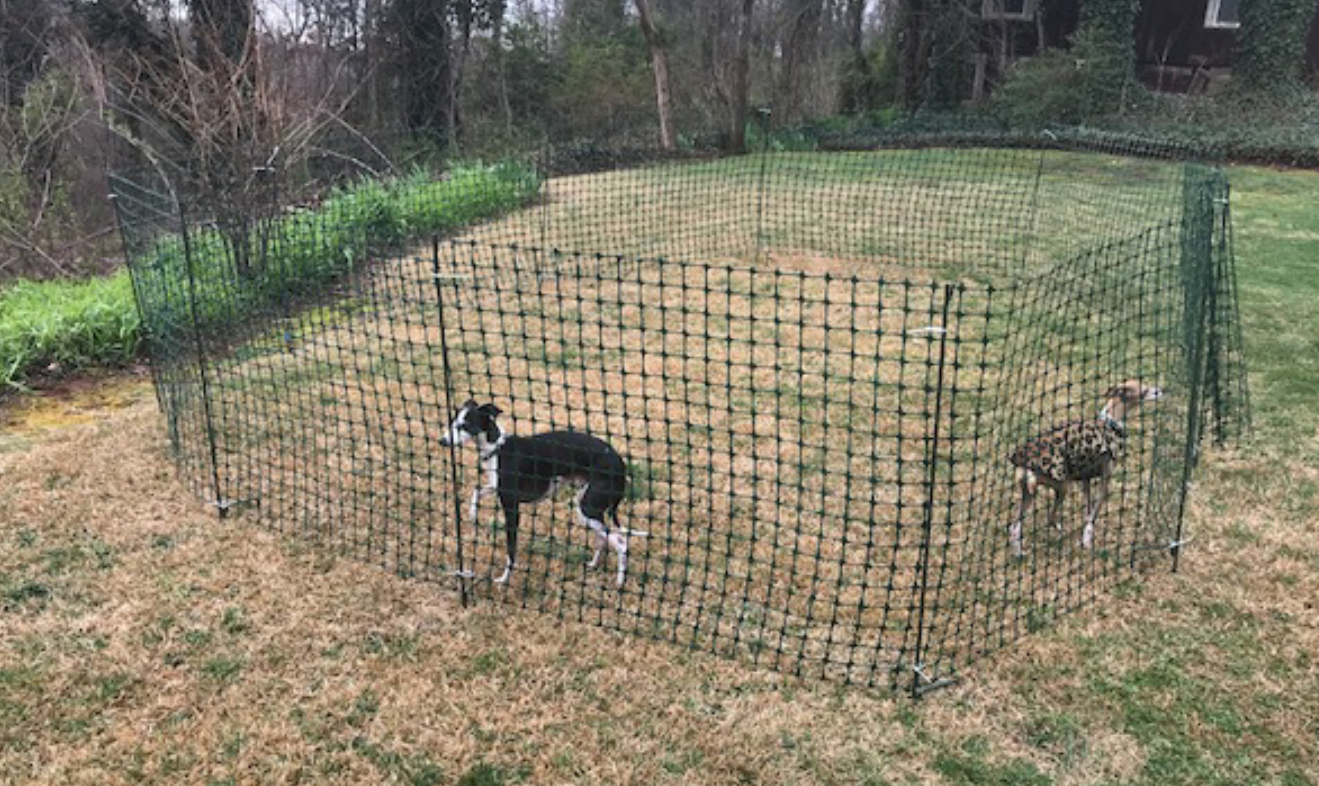
We don’t want to forget to mention that protecting your garden is important too. Consider one of One Step Fencing’s temporary fencing kit products to enclose your garden space. It works great to keep critters and pets out and keeping healthy plants and veggies in. Each kit contains 8 sturdy metal posts, 50′ of green netting and plastic ties to secure the netting to the posts. The nice thing about our kits is the “Y” bracket at the top of each post. It holds the netting in place so it won’t slip or slide. Kits can be combined together to make larger enclosures. Is 3 kits not enough and 4 kits too much? Simply cut the netting with a pair of scissors. Use the extra posts as extra reinforcement for your fence or as stakes for plants that vine or become top heavy. Here is a quick link back to our shop page.  onestepfencing.com/buy-one-step-fencing/shop

Uneven Yard

Uneven Yard

Temporary Fencing Installation Tips:

Installing Temporary Fencing on Uneven Ground

Unfortunately, many of us don’t have that perfectly flat yard. There are hills and dips and the dreaded mole hills.

If you’re having trouble navigating these obstacles when installing your One Step Fencing Temporary Fence, there are a few easy steps you can take to help make it easier.

Main Tip: install posts, then secure the netting to the posts as you go. If you try to run the netting between all the posts before securing with the included plastic ties, the netting can pop off the top as it hits the higher ground.

Place the plastic tie securely at the top and bottom of the post before connecting it to the next post. It sometimes helps to run the bottom tie beneath the “h” shaped anchor and then through the netting. This will help hold the netting down securely to the base.

Use U shaped landscape staples to help hold the netting down in strategic areas along the fence. We suggest at least 2 staples between posts. Do this as you go. These staples will also help if you have small pets who like to nose under the netting.

Enjoy and share some of your tips with us!

Finished Edge Up

Finished Edge Up

Finished Edge UP

When you start to install your One Step Fence, notice that one edge of the netting is finished and one edge is cut. Make sure the finished edge is on the top. If not, you could get a little sagging and you don’t want that! The finished edge sits nicely in the Y  bracket at the top of each post.

To secure the netting to the posts, use the plastic ties to connect the netting to the posts. We suggest one about midway down the post and another near the bottom. Sometimes if you have uneven ground you may want to take the tie and wrap it under the “h” anchor at the bottom. Another option is to use the U anchors that landscapers frequently use to keep the bottom netting tight against the ground.

Small Pets

Small Pets

Lots of people are using their One Step Fencing kits for their small to medium-sized pets when camping or even just at home in the backyard. It’s a great use, however, not all dogs like the idea of being on the inside of a fence (even one as good looking as ours!). We suggest you check on your dogs frequently the first several times you use the fence to see how they react.

Some dogs are chewers. Our posts can stand up to Fido’s fangs, but the netting… not so much.

Some dogs are escape artists. Customers have told us they use metal “u” shaped garden pegs that professional landscapers use to secure the bottom of the fence to the ground between the posts. But even that might not work for the most determined pets. Just keep an eye on them. We’re dog lovers too and we want to keep your furry family members safe.

Here’s a link from the Humane Society with tips on how to keep your dog from escaping. www.humanesociety.org/animals/dogs/tips/escaping.html

Let us know how you use your One Step Fencing kit!